First, we find out why the domain is needed. Now that you have seen lesson 1, you will see that we have access to Hass via IP. But the internal IP is only available when you are in the same LAN, and how to go out when you go out. That’s the reason we need to go to Domain. In case you do not know, in web names like google.com, google is that domain. It makes it easier to remember to access than the server’s IP. I will not be able to explain it all here, if you do not know about the domain then you will find out more yourself.
1 / Register Duckdns
We start by first going to https://duckdns.org/ to register an account (free).
After registering, please log in. You will see the following figure:

The Token series is quite important, so please pay attention. Just pay attention, there’s no need to do anything else.
Go to Domains, then you enter the name of your choice and click add domain. Each of you gets duckdns for free 5 domains, but we only need 1. After clicking add domain, the domain name you put it will show down below like your image. That was a success in creating a domain from duckdns. Very long, sip some coffee and continue.
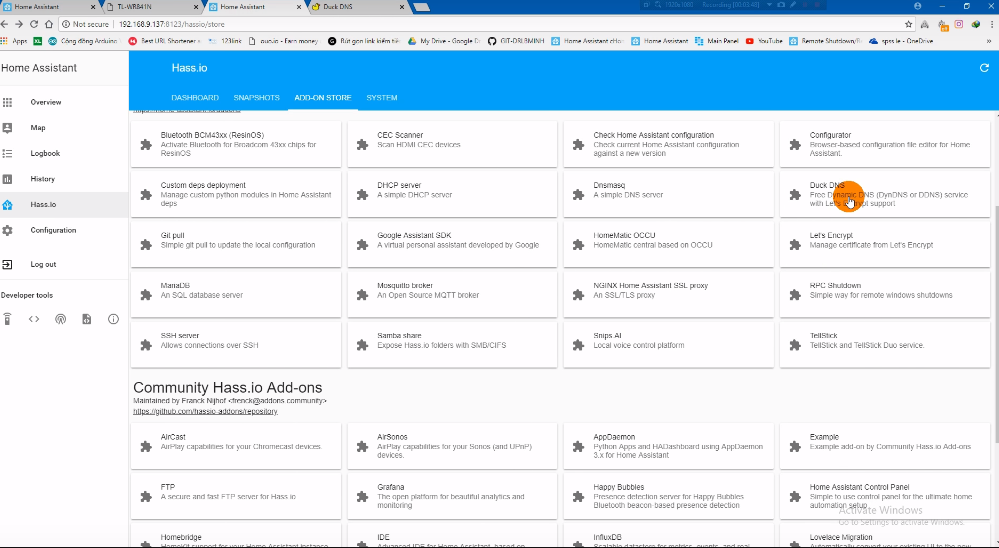
2 / Install add-ons Duckdns
Now go to the install addd ons Duckdns. Go back to Hass.io in the left panel, select Add-ons store, choose Duckdns like in the previous lesson, we will install Samba and SSH.
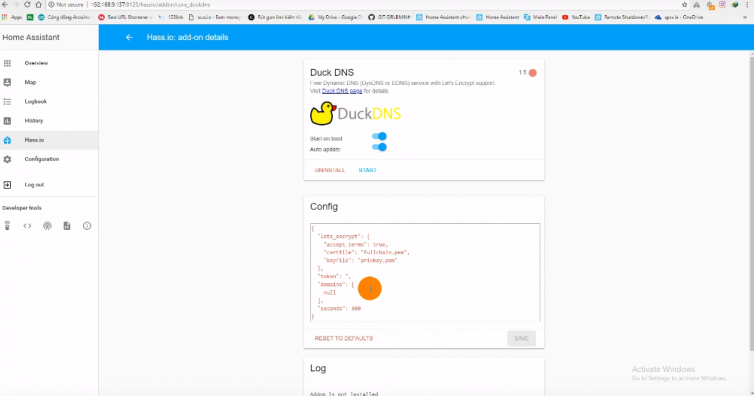
After clicking Duckdns you see the following figure. You fill in the following:
The token place, you go back to the home page to copy the long token that I said earlier. Copy it all into paste, remember to put your token in brackets (“abcxyz”).
The domain, you enter the domain you created earlier, and remember to put it in quotes. (“Adc.duckdns.org”)
Finally click Start.
3 / Authorization
After clicking Start, you open Putty up (lesson 1 I had instructions on Putty). You enter the command after ls / ssl (the letter l is not the letter L). You will see results appear fullchain.pem and privkey.pem white. These are two files that have not been licensed and we will proceed to grant them permission. In case you do not see the name of the other 2 files appear, because you configured add-ons is not right, check again.
Next, type sudo chmod -R 775 / ssl and Enter
Then re-type ls / ssl
If you see that the two files fullchain.pem and privkey.pem just now turned green, you have done the right thing. Only the next step.
4 / Add code to configuration.yaml
We enter the configuration.yaml file in Samba and add the following line of code, paying attention in the configuration.yaml file, only one location http: only, please double-check that you don’t overlap, hass will report it.
http:base_url : abcd.duckdns.org
ssl_certificate: /ssl/fullchain.pem
ssl_key: /ssl/privkey.pem
api_password : abcd1234
Once you have finished adding hass again, select Configuration in the left panel (located near Hass.io), select General, and click CHECK CONFIG. If you see CHECK CONFIG report an error, please check the above code to see if it is correct. If you see configuration valid message, congratulations.
Finally, click Restart.
5 / Open port
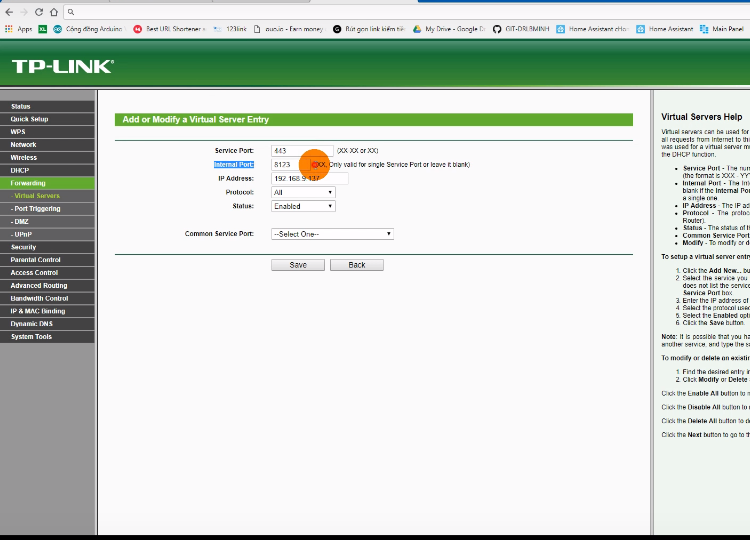
Next we open the port on the modem. We open the port so we can access our Hass from the internet. You do not understand the effect of opening the port, see more on google. In this case, we just need to open port 443 to 8123.
We use different modems, so the port opening is different. However, there are some general rules, so if you take the general rule, you will find the corresponding item on your own modem to do it. In my case is a Viettel WR-841 modem.
You proceed to the admin page of your modem, which is 192.168.9.1. After login is complete, you go to the Port Forwarding or NAT section (you open all the items to find it, a little bit see). After finding it, you can see that the port opening section has the following basic cells:
There are always two ports for the port, corresponding to an internal port and an external port. We need to open 443 on 8123, so you enter 443 and 8123 one after the other (just enter them, then change the position again). The IP Address we enter IP of Pi. The Protocol you select All (UDP and TCP). Done, click Save.
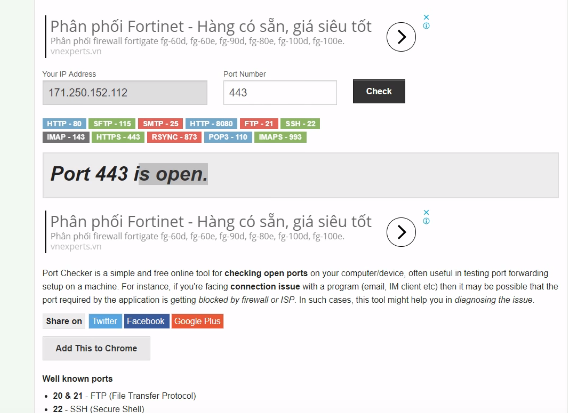
6/ Check Port
After opening the port, you proceed to check if the port is open. You go to portchecker.co to check, enter 443 and click CHECK. If the Open message is correct then. If you press Close, you should re-enter the port opening just now, reversing positions 443 and 8123, then check again.
7 / Check the results
After you have done the above steps successfully, you will re-enter with the address http s: // ip: 8123 or https://domain.duckdns.org (both cases notice the ‘s’ behind the http, do not forget). And we won’t be able to go to http anymore.
Note: the cases in the LAN that cannot be accessed by the domain are due to your modem without a NAT loopback, so bear in mind that the LAN must be in IP.
1 comment
Hi! I like your lessons Home Assistant! Thanks for the lessons.
There is a small one thing I don’t understand. I hope you can help me….
What you mean by: “Is / ssl” ?
Your instruction:
3 / Authorization
After clicking Start, you open Putty up (lesson 1 I had instructions on Putty). You enter the command after ls / ssl (the letter l is not the letter L). You will see results appear fullchain.pem and privkey.pem white. These are two files that have not been licensed and we will proceed to grant them permission. In case you do not see the name of the other 2 files appear, because you configured add-ons is not right, check again.
My putty says when I logged in:
Our Cli:
$ hassio help
Can you help me with this?
gr. László Nieuwenhuizen